On Pinterest I found a link to a site called Wedding Chicks where these nifty little boxes were found. Here is their link for the Be My Maid boxes. They have a tutorial already, but I changed mine a little and will still share.
Needed supplies:
Wooden Boxes (mache works, too)
Papercrafting glue
Paint
Paintbrush
Oil
Scrapbooking paper
Scrapbooking stickers
Scissors (regular and scrapbooking)


So I wiped my boxes clean before starting. The boxes I picked up from Hobby Lobby on two different trips using the 40% off coupon from the app on my phone.
I measure the inside of flat of the boxes and cut out two rectangles of that size from the same paper. I customized the boxes for each maid: one was pretty and lacy, the other cool typewriter keys. I used Martha Stewart crafting glue to coat the wrong side of each paper and lay it in the box, rubbing to make a strong seal. Usually I am not a fan of Martha Stewart, but this glue was amazing. No bubbling or weird shapes showing up while drying.
While the Glue was drying, I went around the edges with gold paint. It took two layers before it showed up really well.

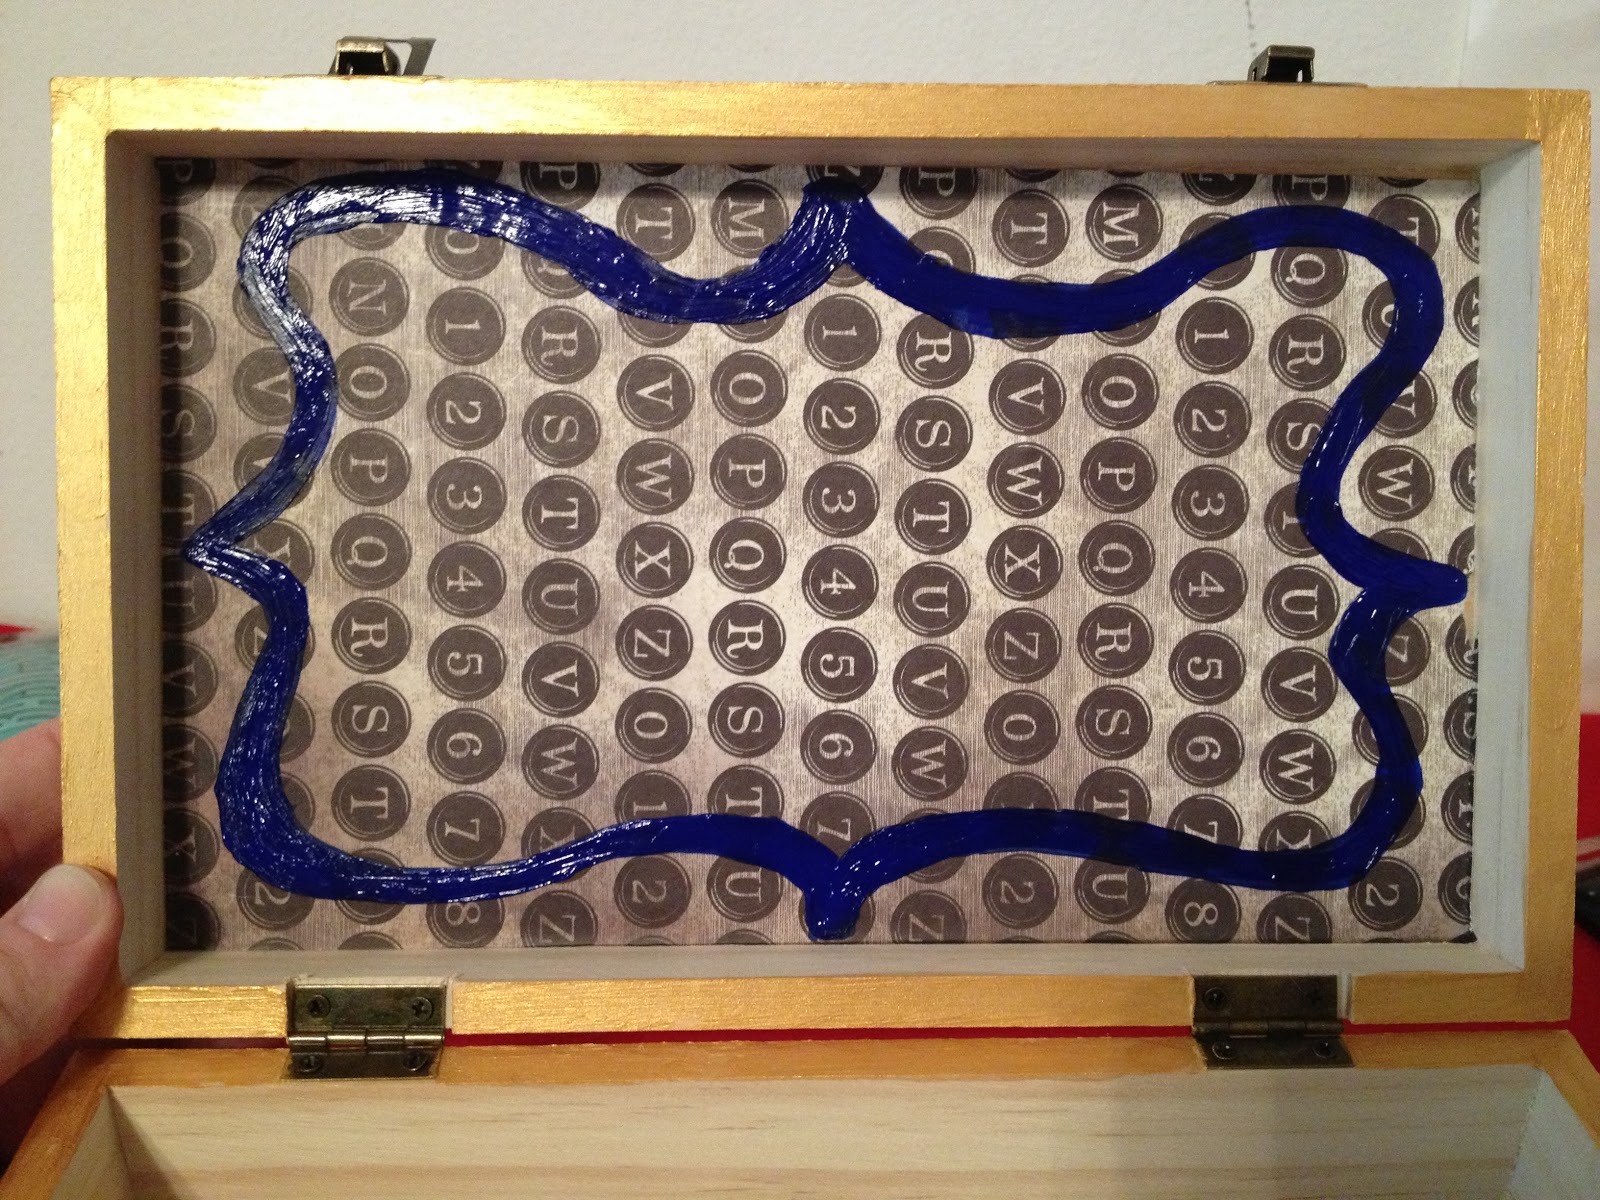
Now, I changed the way I was going to do the brackets. Instead of painting the entire area around the brackets, I just left the bracket line. Two coats of acrylic paint. It had to be left a while to dry because the paint became really thick in some places.
Later on I discovered the gold paint was sticking to itself when closed. I took some peppermint oil and rubbed the lining. It's been two weeks and hasn't stuck since then.

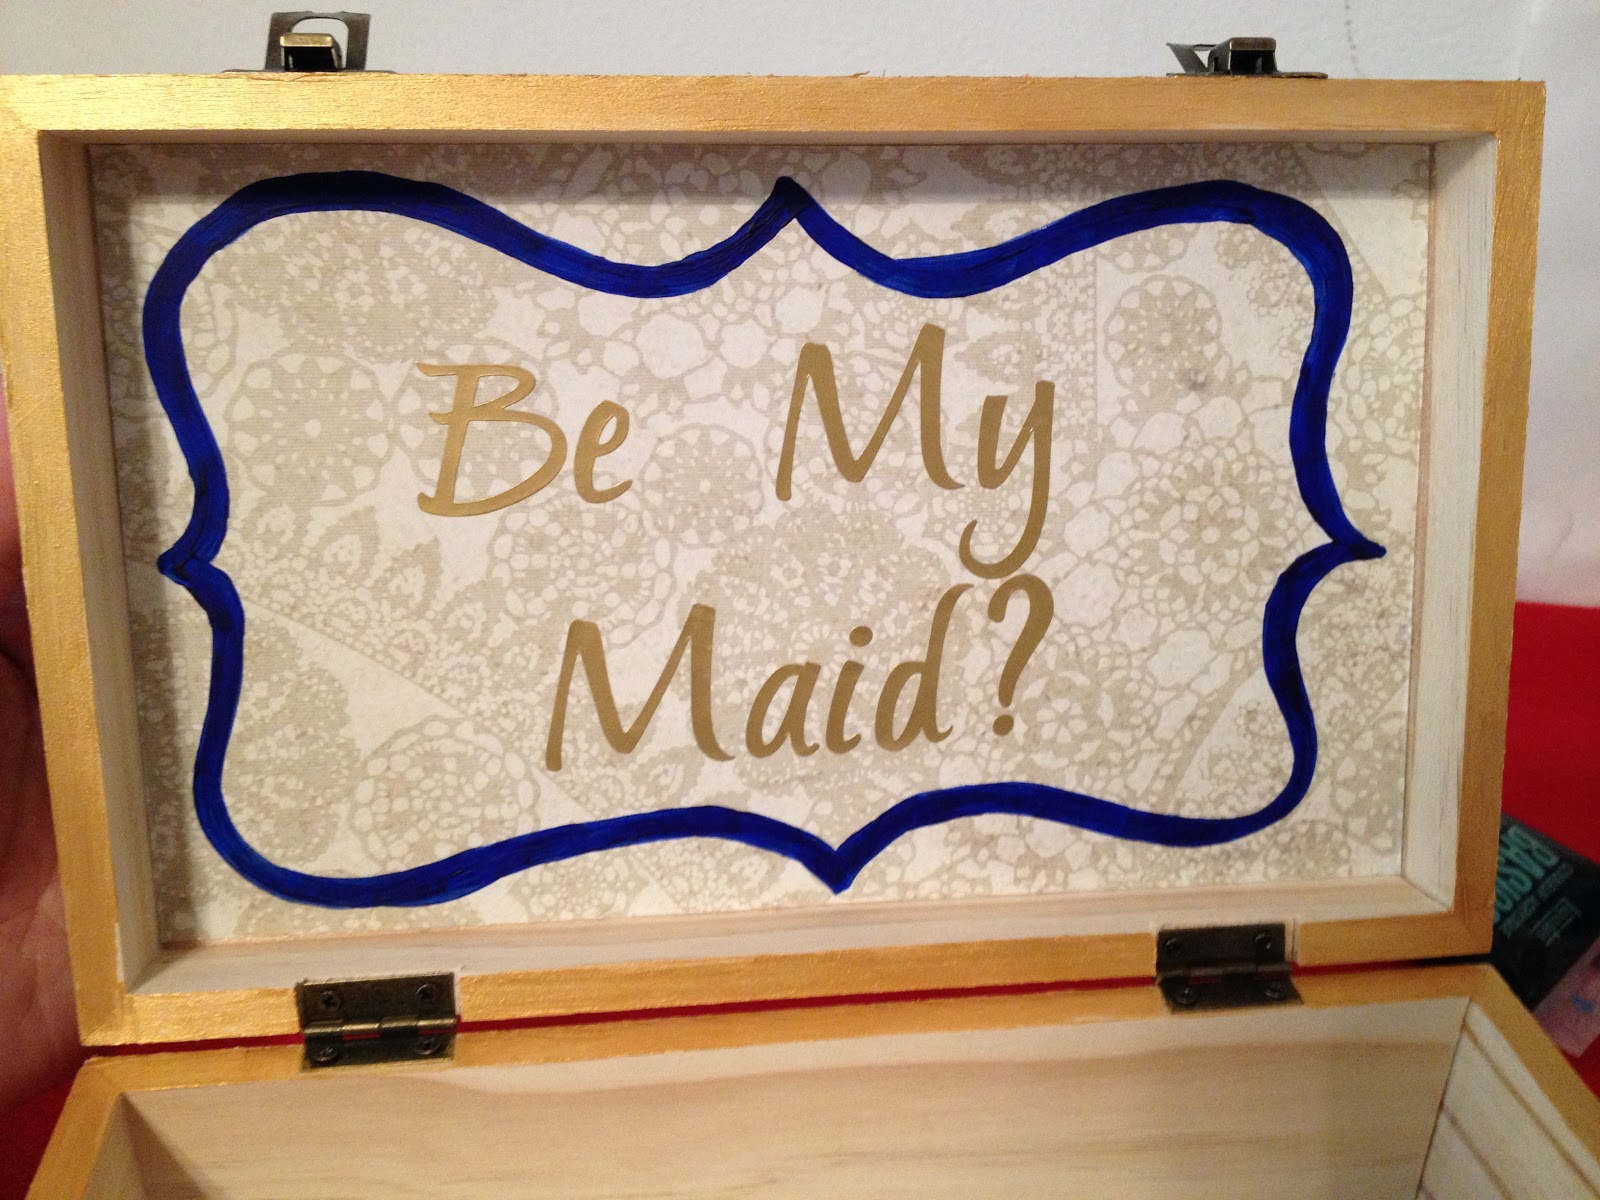
Next I was going to paint the words and decided against it. My OCD was having a riot. Instead I used scrapbooking stickers. One pack had more than enough for both boxes.
Now to move on to the contents. Inside I typed, sized, and layered four cards of information: Our Day, Your Role, My Girls, Your Dresses. Each card contained the information for each subject. To give it a decorative top we used scrapbooking scissors.


Now we had to have a binding of appropriate design. Found adorable, decorated ribbon in the scrapbooking section of Hobby Lobby. One with gears, one with keys, and the third with clocks. Used the keys and clocks for my two ladies. On top of that I layered and thinner ribbon in one of our selected blue colors. Under both of those I used a wide, cream ribbon as a base. I used hot glue to attach them to each other on the back side. Then selected two gears to layer, glued them to each other, then attached them to the ribbon.


Now for the rest. I took paint samples in the themes and colors we are going for, cut them down to a size that would fit in the box, glued them in to new strips, and held them together with small, brass paperclips.
Also we picked out some inspiration pictures to help get their creative minds working. Different ideas and examples of steam punk, and held them together with a hanger shaped paper clip.


Combine it all together and added some personalized treats. For the Dragon she got a packet of flavored Via and Godiva chocolate(milk chocolate with caramel). For the Tiger, she also got Godiva (dark chocolate with sea salt) and was taken out to dinner. Here is the Dragon's box. I still need to upload the Tiger's box.

I hope you enjoyed and that this helped. Please leave a comment telling us what you think or if you are going to try it on your own. Thanks!
~Lion
Pfft, you can totally tell that I'd already gotten into my treats. :3
ReplyDelete